Company Customer
Company customer UX/UI.
Design Guide
These are examples of screens you can include in your design flow. Each example contains information about the purpose of the screen. We also will share the dos and don'ts when designing each screen.
Below you can see the summary of the screens that will be presented on this page:
📑 Summary
- Create Account
- Upload Members Identification Document
- Quotation
- Create Recipient
- Create Outbound Transaction and Upload Invoice
Create Account
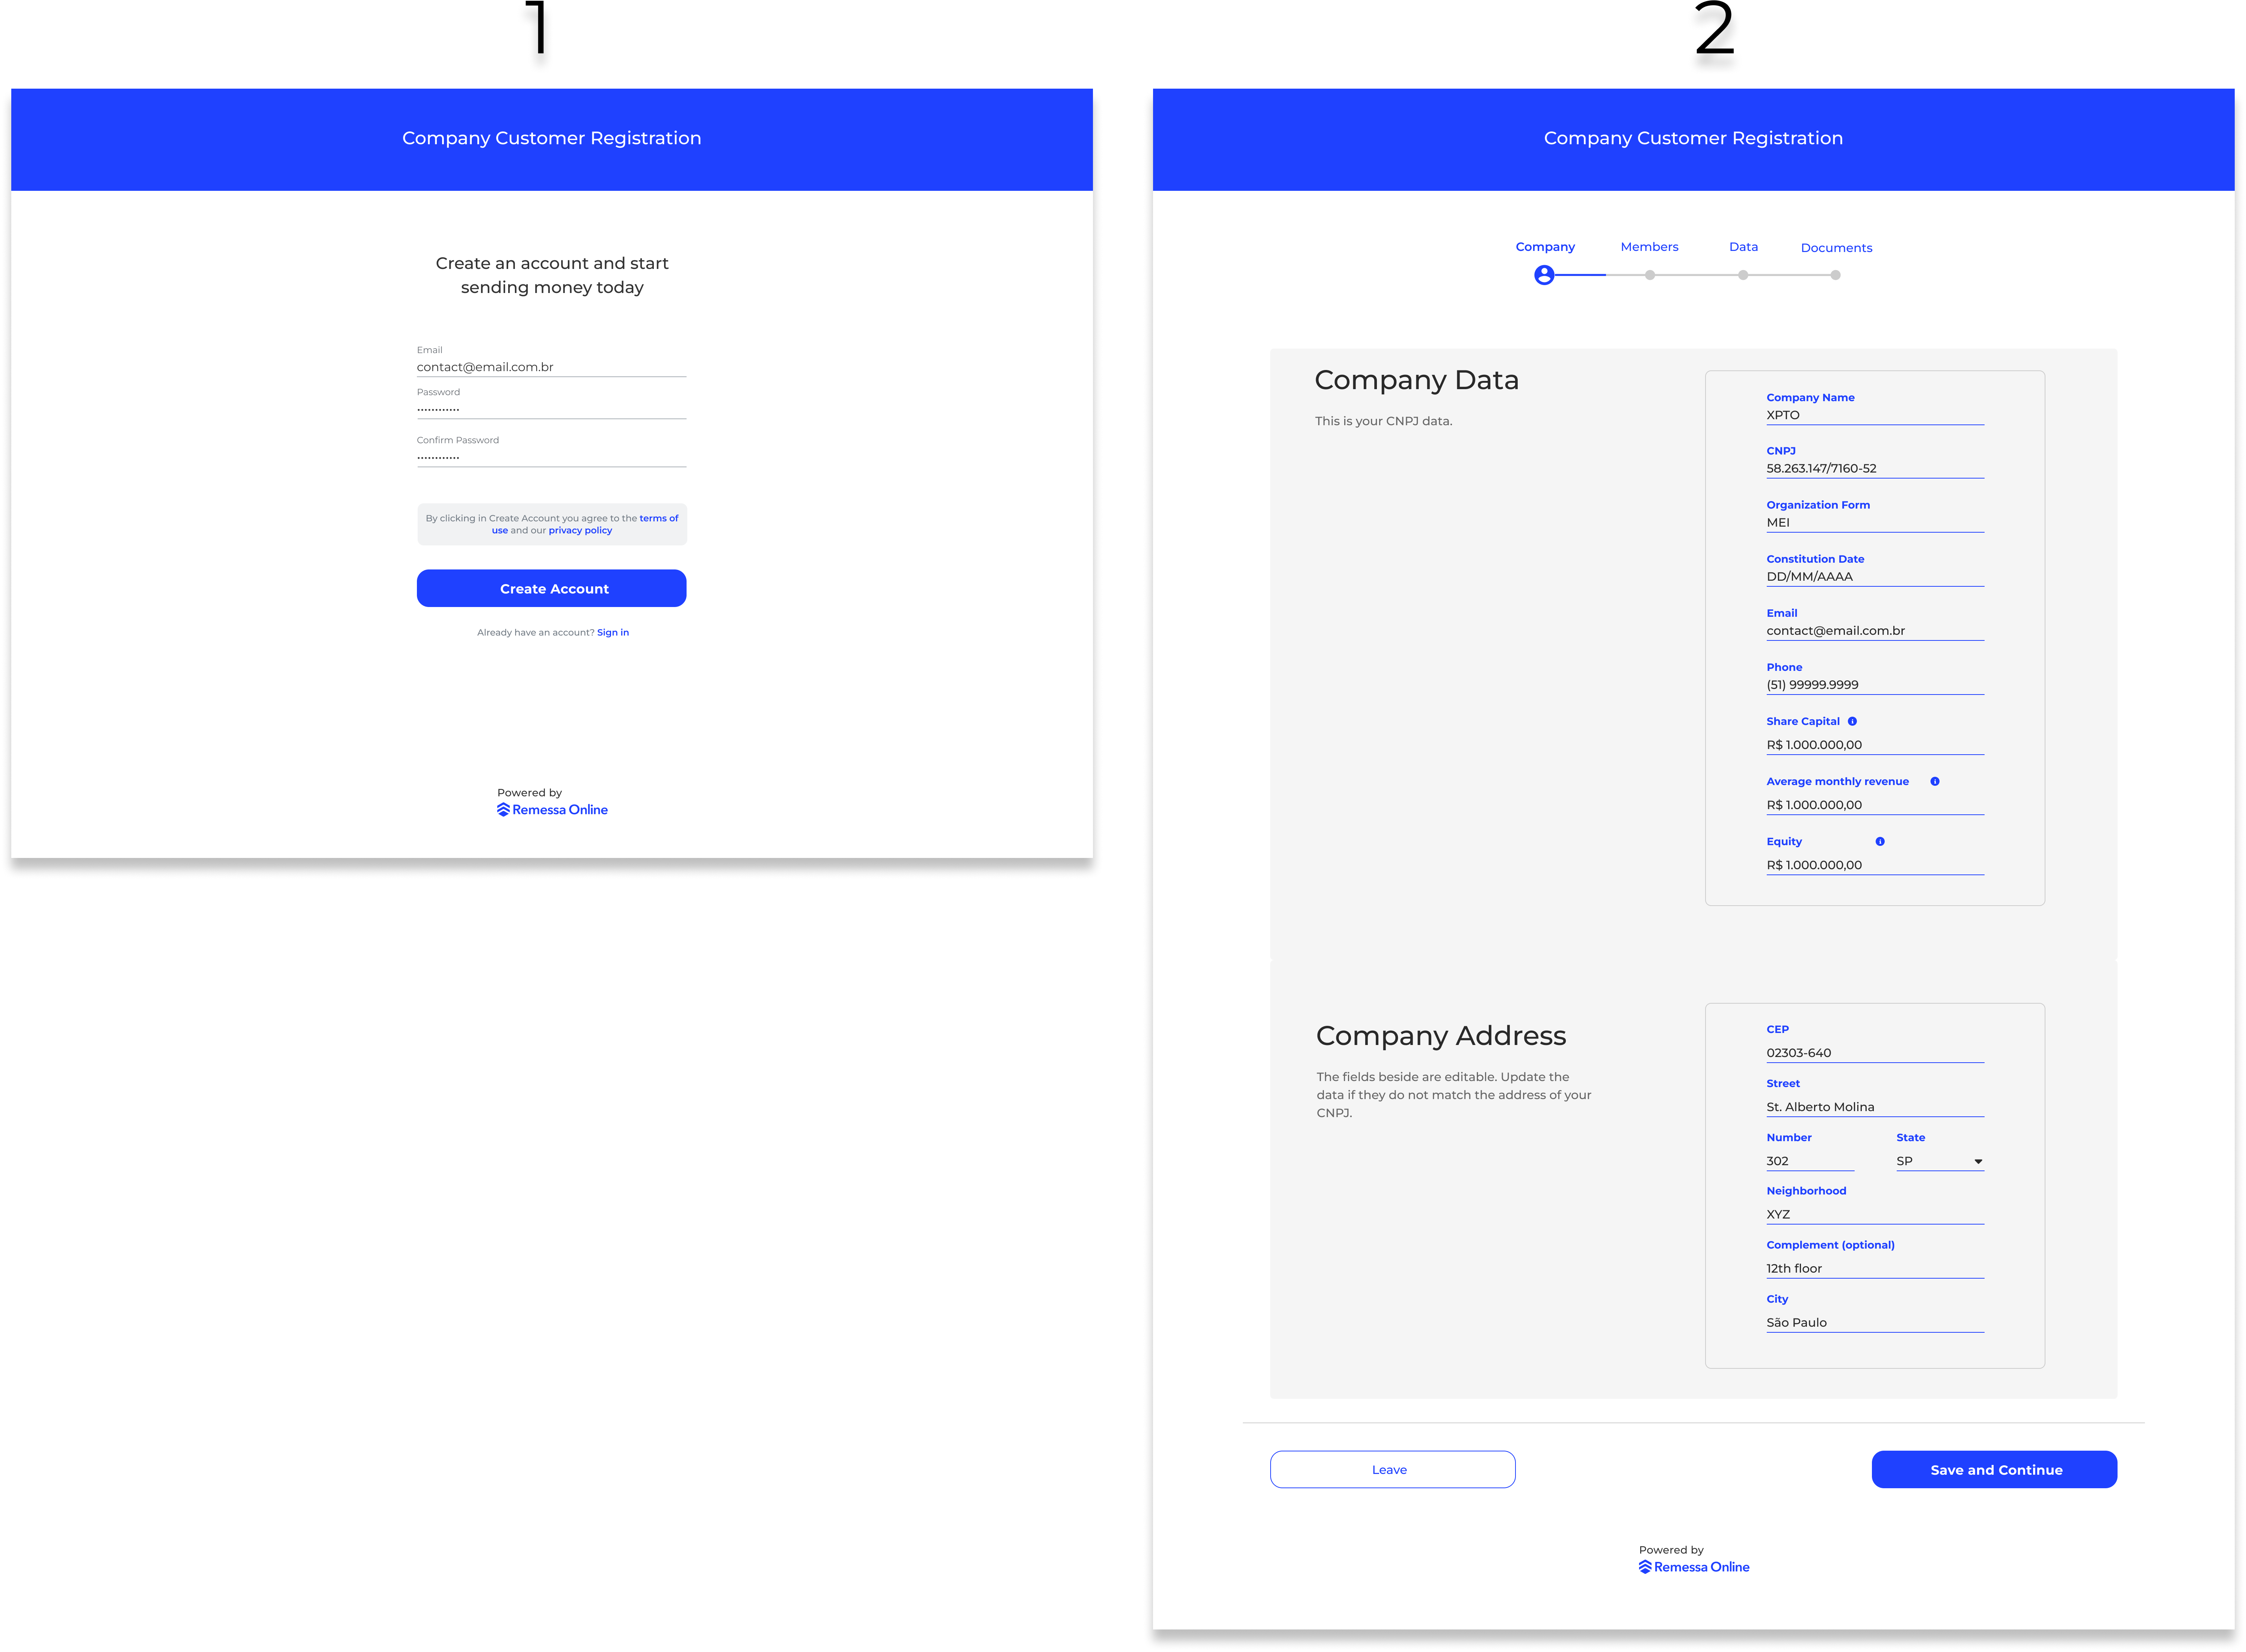
This is a registration flow that may be used if the partner wants to compare the information we request in FXaaS with the information that the partner may already request in their own registration flow.
In screen 1 we have a suggested login screen, as per screen 2 we start with the company registration data. The fields, however, are related to organization details and company address information only.
Create Account (1)
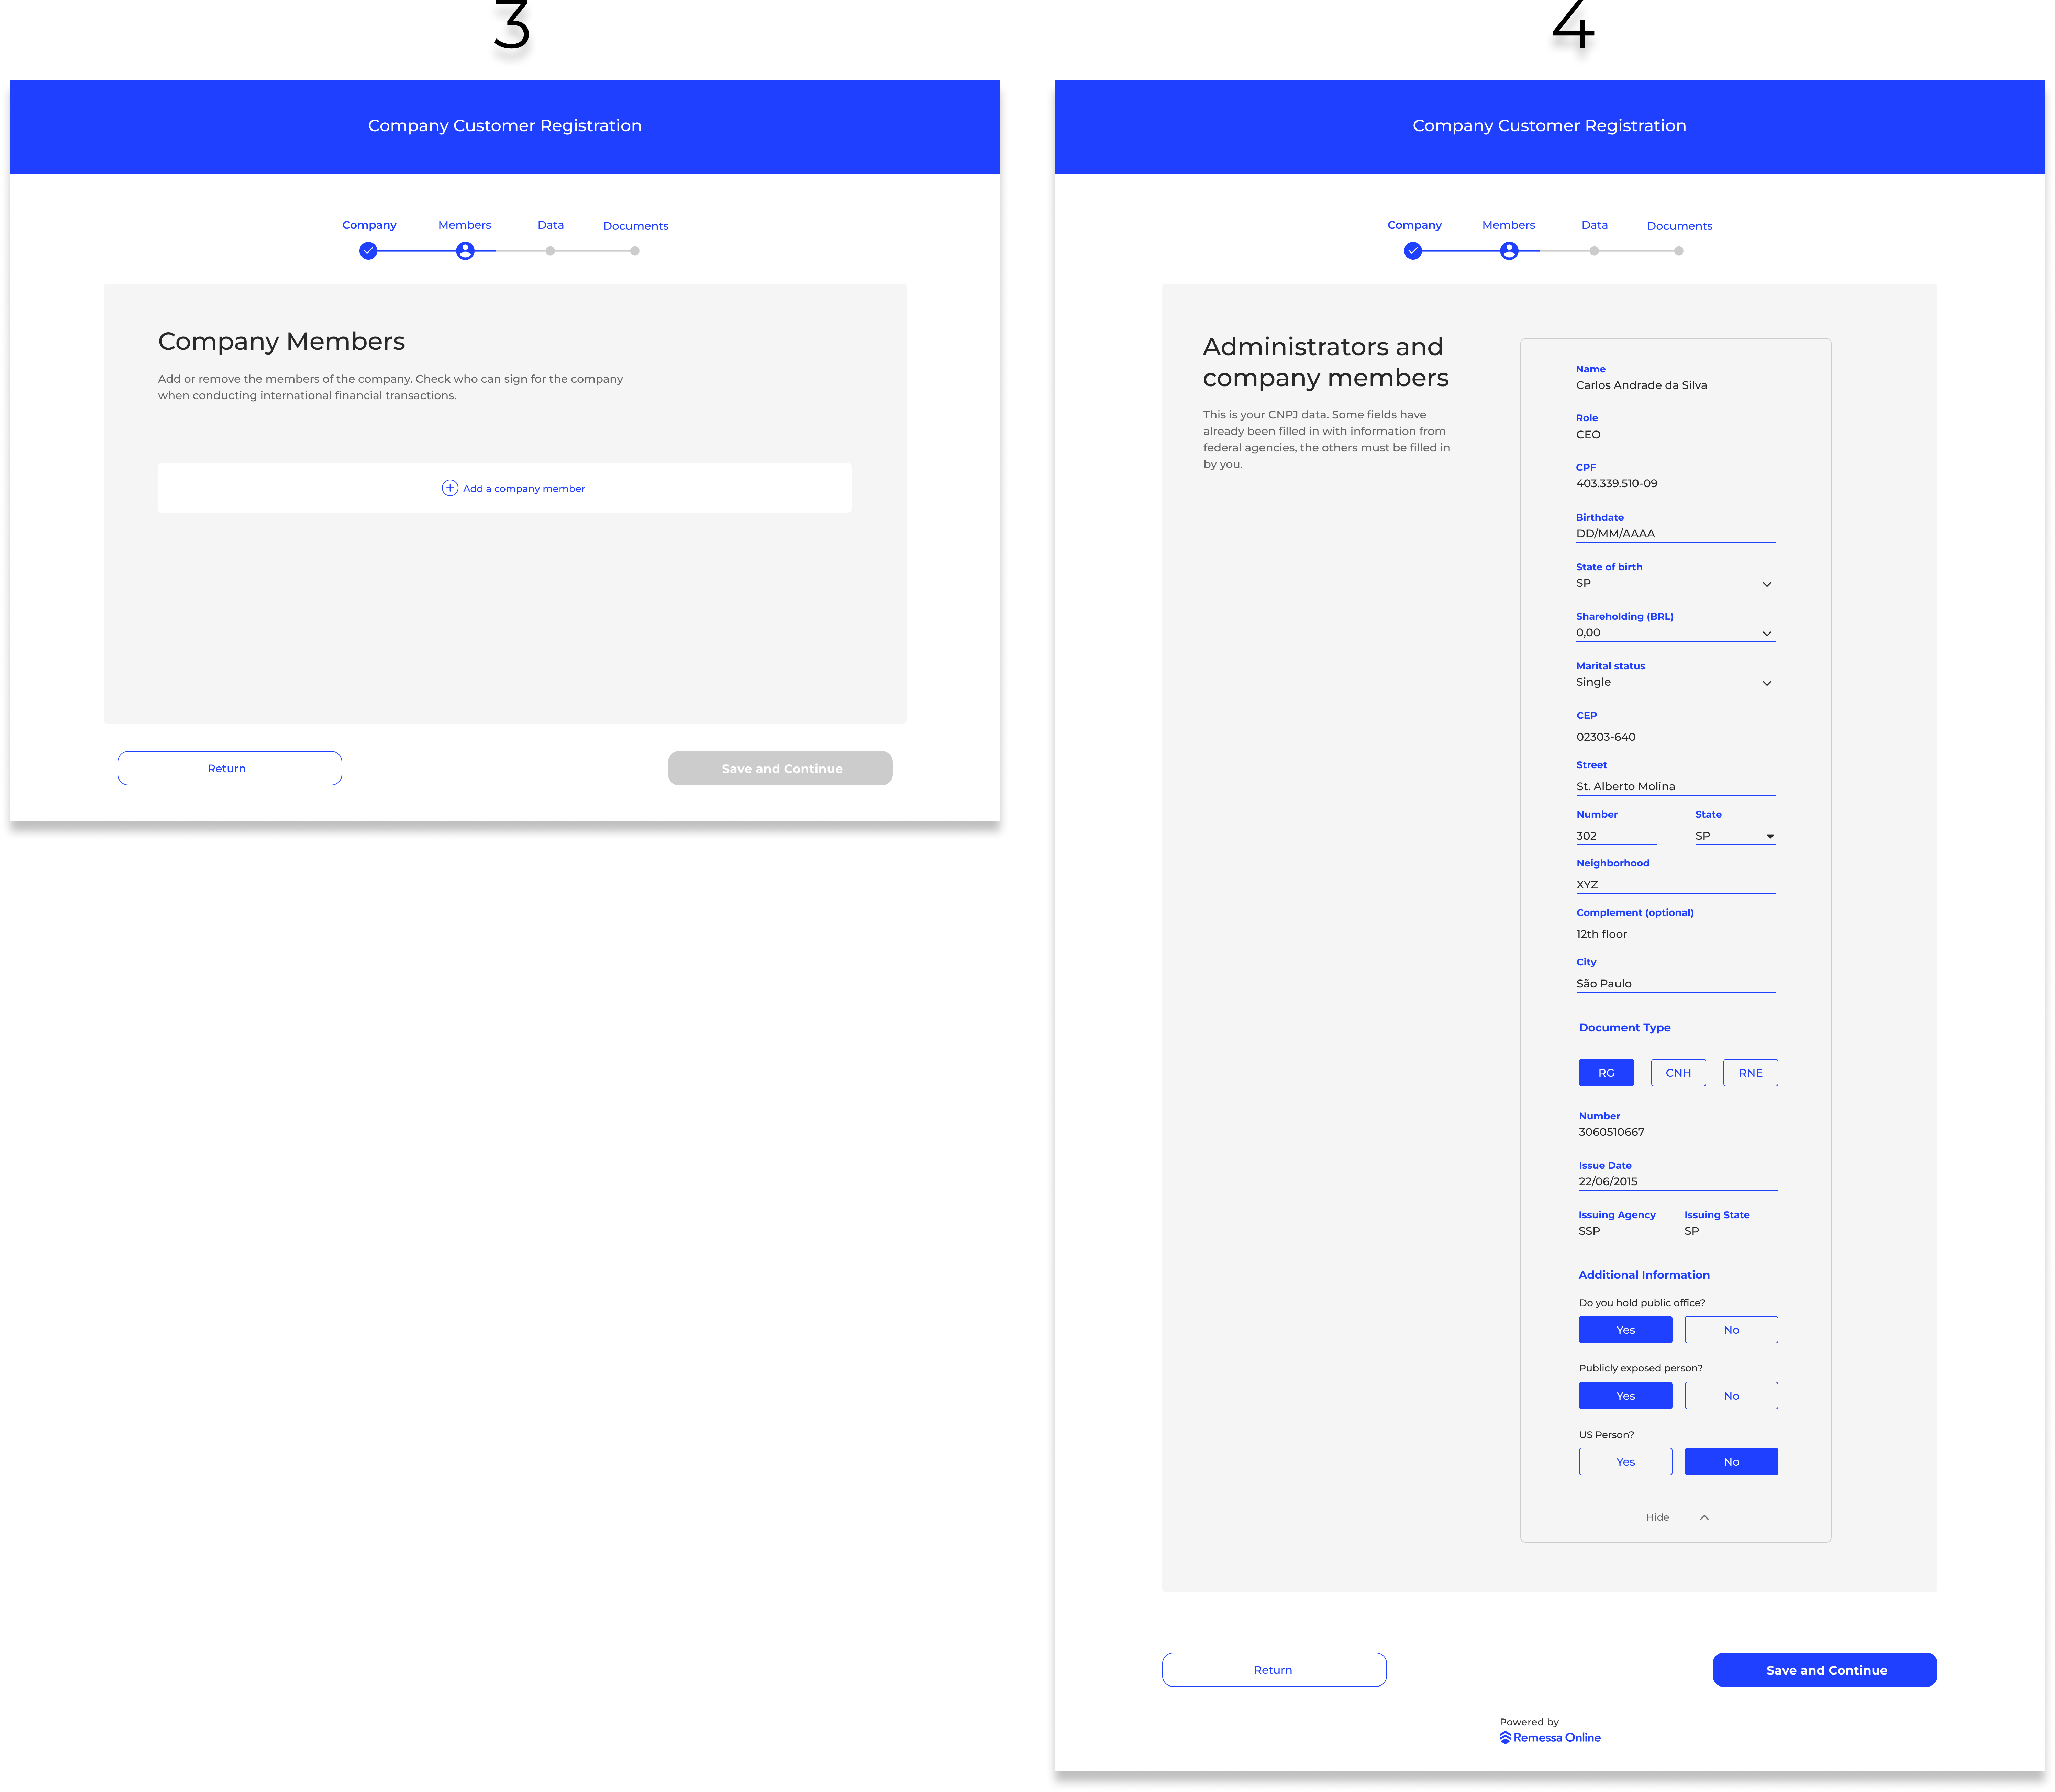
Screens 3 and 4 correspond to the process of adding the company's shareholders. Each partner will need to be added individually by completing the information on screen 4
Create Account (2)
Upload Member's Identification Document
Screens 5, 6, and 7 correspond to the process of uploading the identification documents of the company's shareholders. Especially for screen 6, we suggest inserting a step-by-step of how to better take a picture of the chosen document.
The identification documents can be:
- RG (ID card)
- CNH (National Driver's License)
- RNE (National Registry of Foreigners)
- Passport (Brazilian Passport)

Upload Members Identification Document
After uploading one of these documents, FXaaS performs a data enrichment and KYC of this company customer. Once these processes are completed, the customer's status changes from "awaiting_document_upload" to "approved", and now the customer is able to create international transfers.
Terms & Conditions and Privacy PolicyIt is the partner's responsibility to require the customer to agree to data sharing with Remessa Online. This needs to be done in order to have complicity with LGPD (General Personal Data Protection Law).
Not MandatoryIt is important to note that the "Create Account" and "Upload Members Identification Document" screens are not mandatory. If our partner already asks for this information during its journey, it will only be necessary for the partner to send this previously collected data on the backend.
Quotation
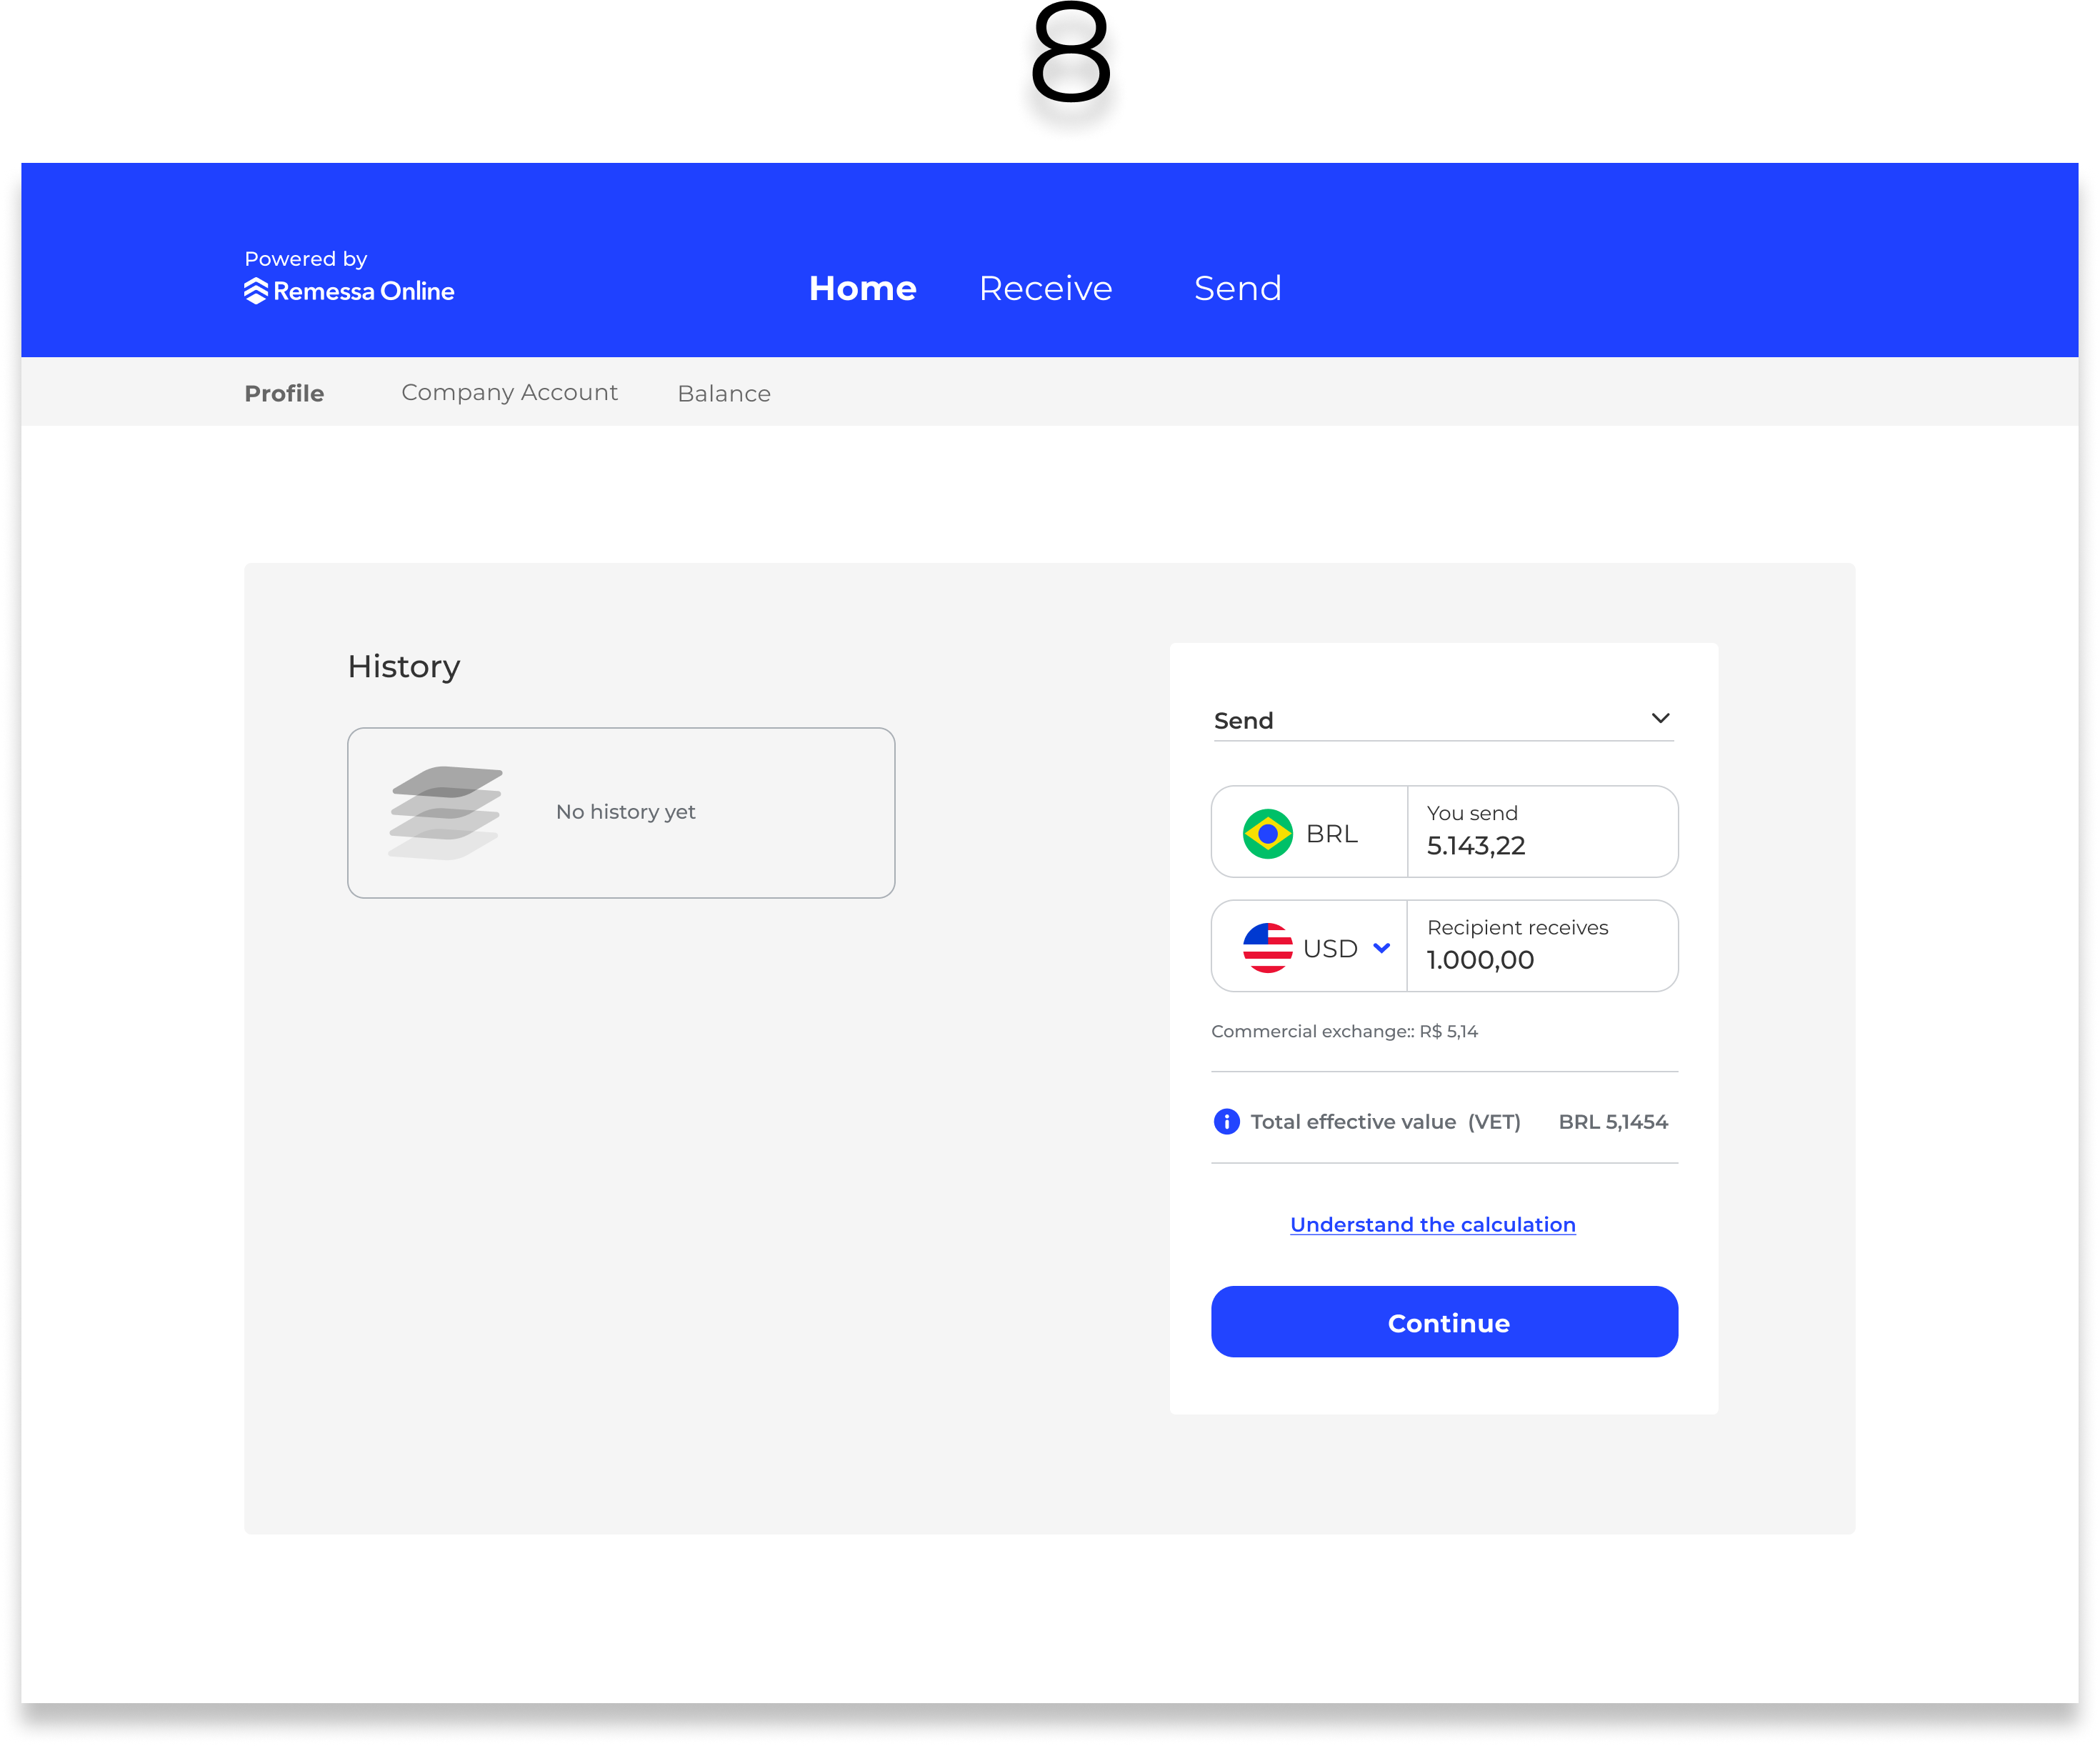
After the company customer has been created and approved, the next step is to create a quote.
In screen number 8, we can see a home screen where the customer can easily access and simulate the quote generation.
Quotation
Display feesOn the quotation screen, it is necessary to display all the information about fees, taxes, and duties to the customer. This is required by the Central Bank of Brazil (BACEN).
Create Recipient
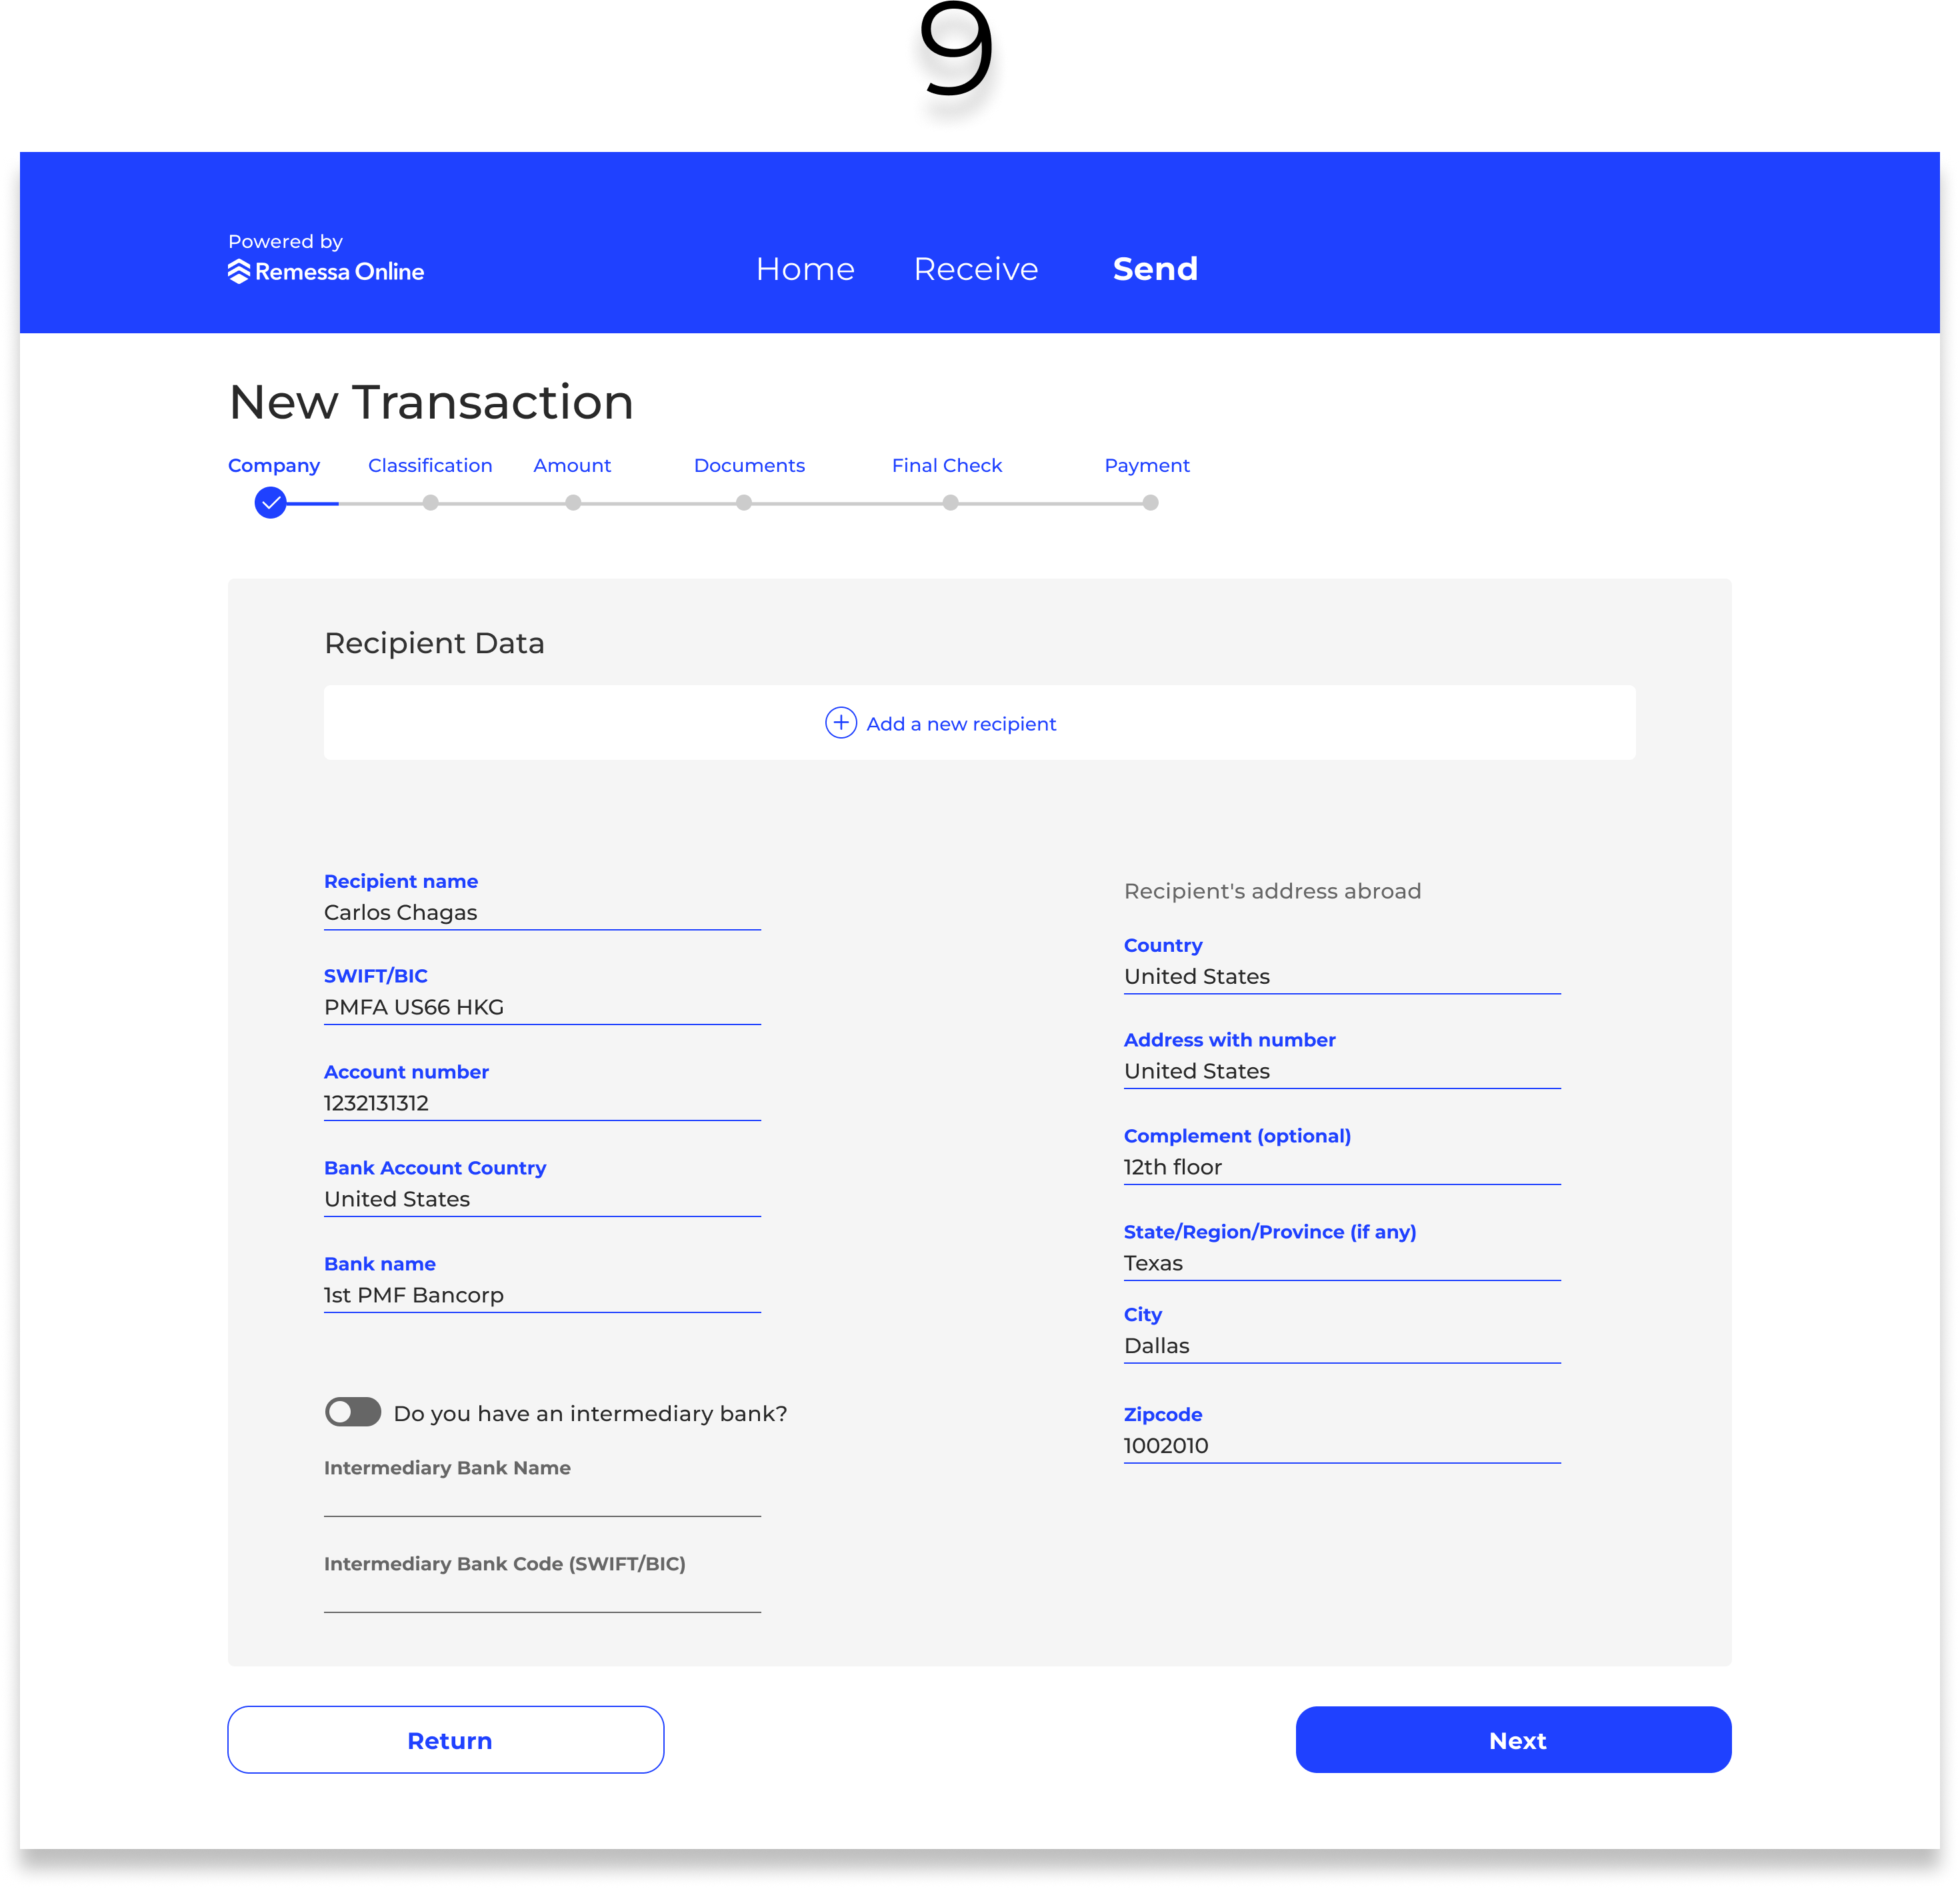
After generating a quote and clicking "Continue" on screen 8, the customer should be led to screen 9, where he will create a transaction recipient.
Create Recipient
Create Outbound Transaction and Upload Invoice
After creating the beneficiary, the customer should be led to screen 10 in order to select the classification of the transaction. This "classification" field is a parameter that supports the purpose of the transaction that is being created.
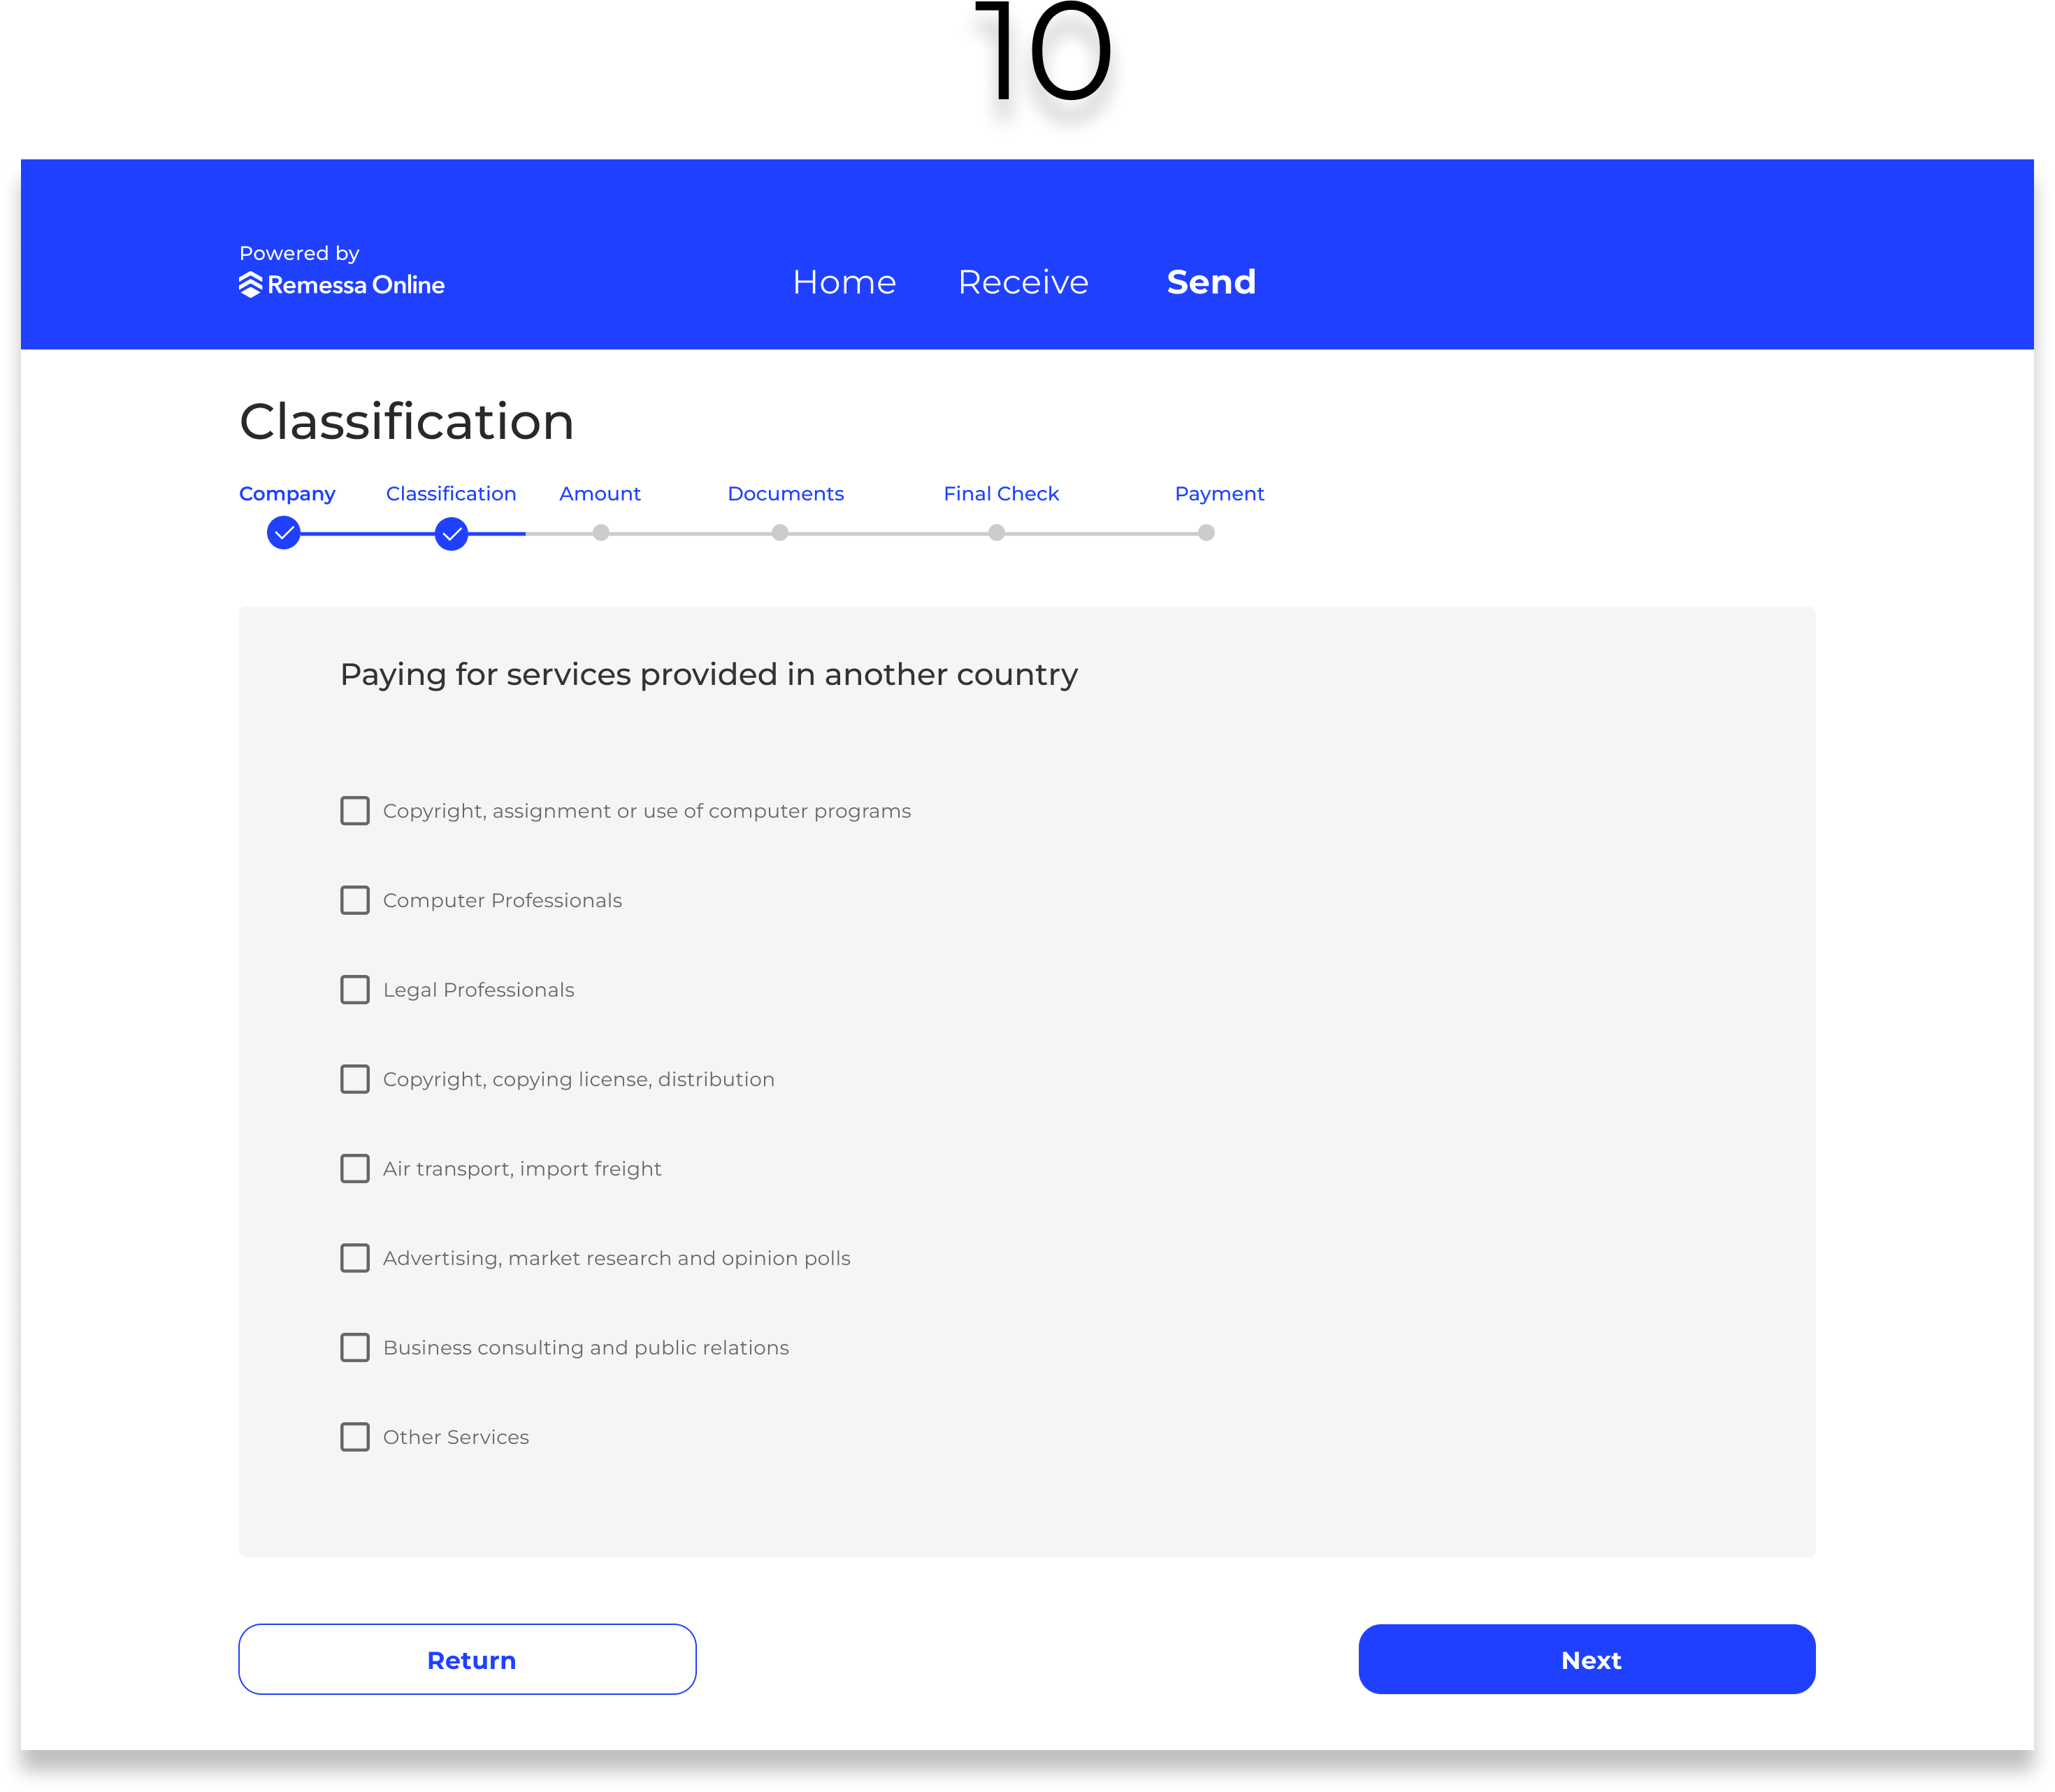
Select Classification
Following, screens 11, and 12 correspond to the steps in which the customer will select the amount desired to transact and upload the invoice document.
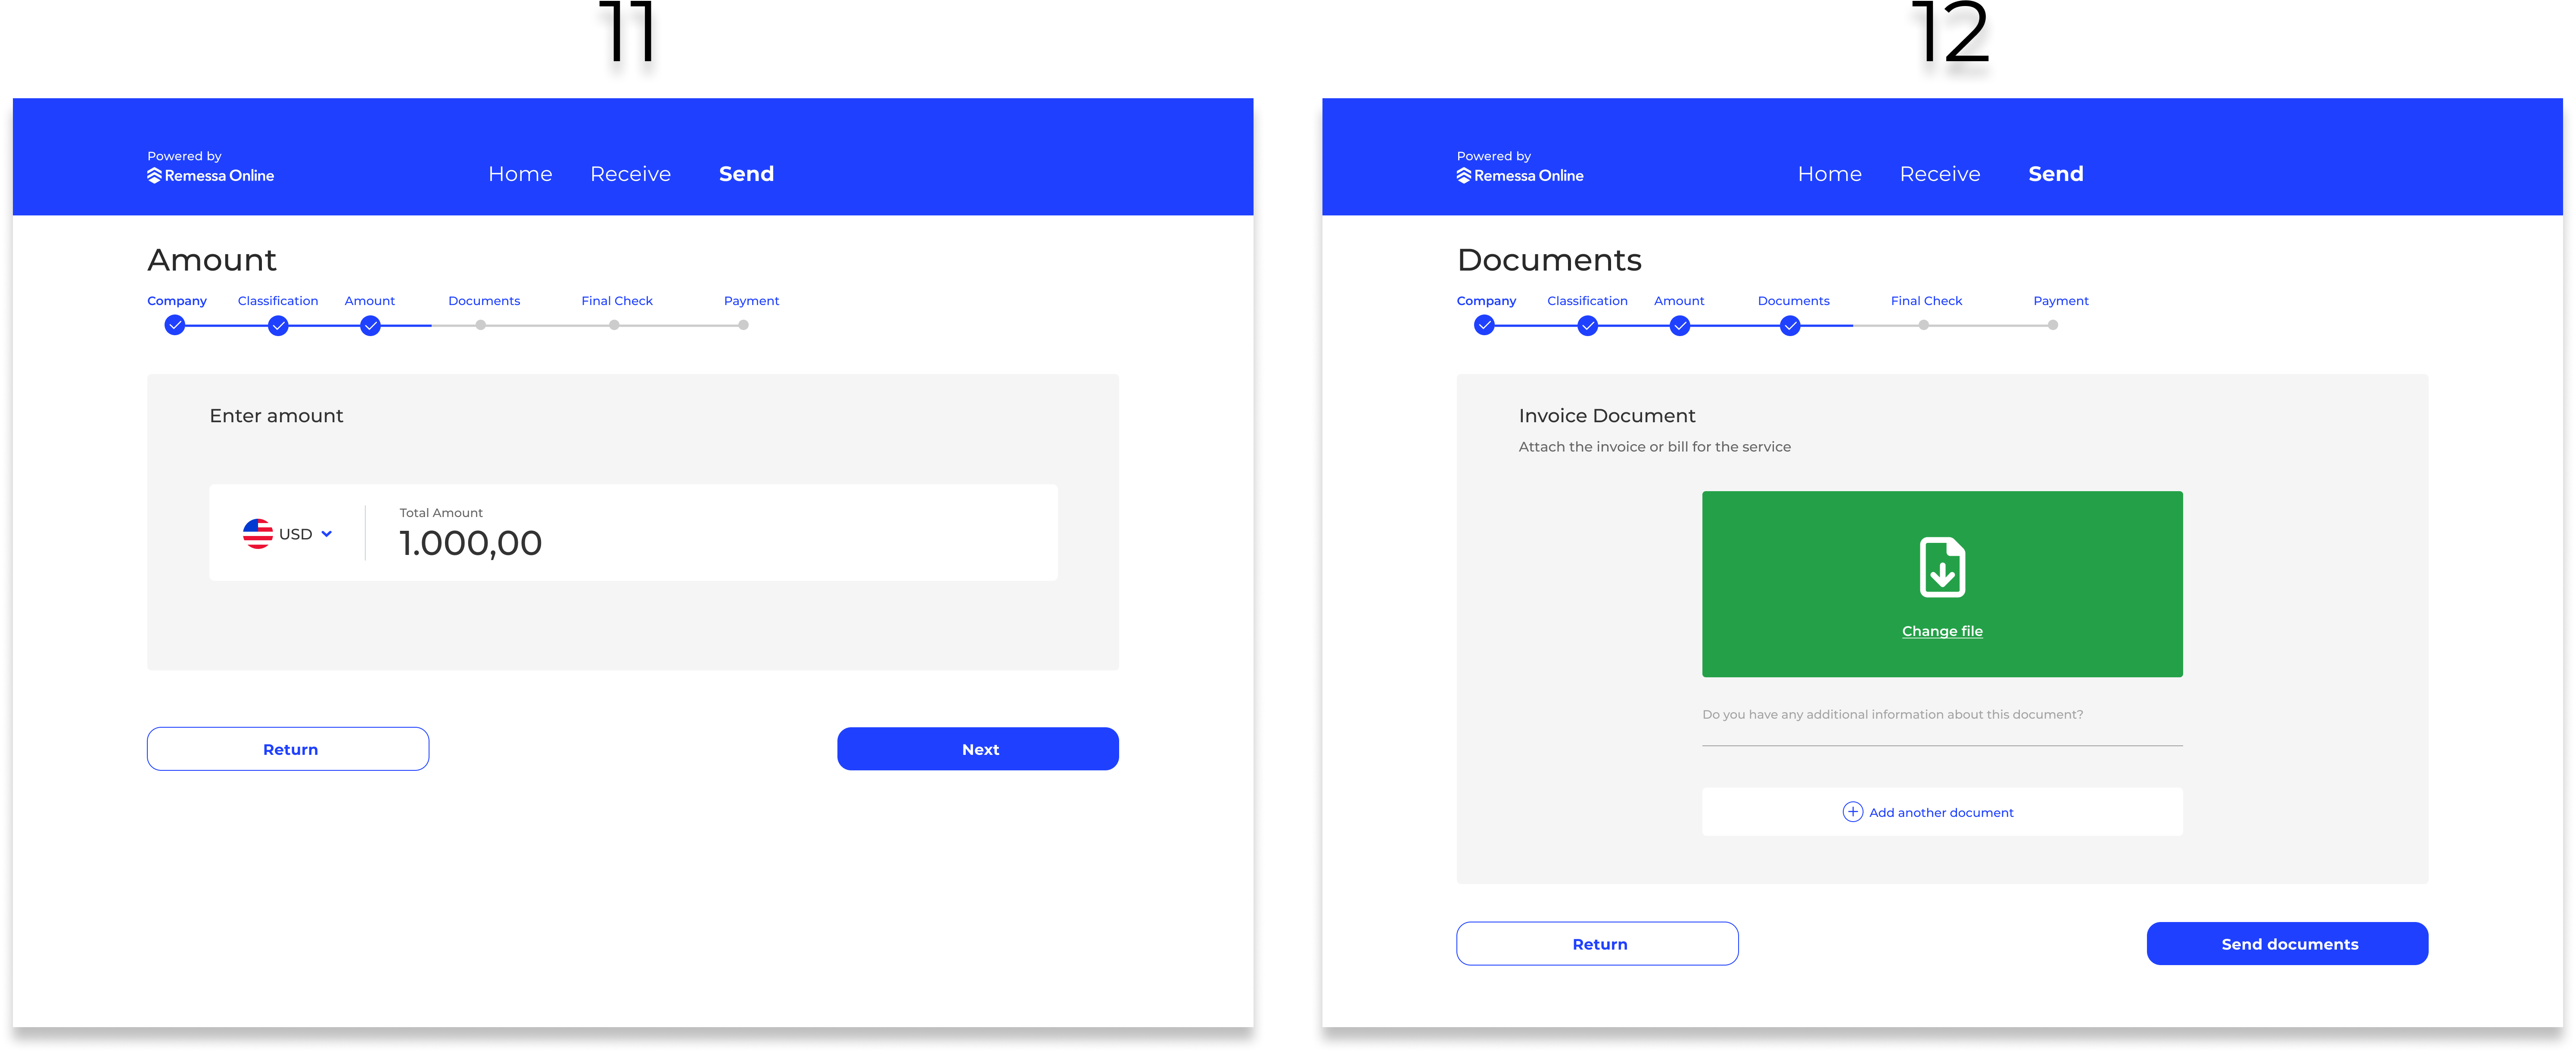
Insert Amount and Upload Invoice
Finally, we have the final check screen (screen 13) in which the customer will be able to see the summary of the transaction before creating it. Right after, screen 14 should be displayed so the customer can see the payment details. It is important to note that screen 14 should only be displayed when the transaction is successfully created in FXaaS.
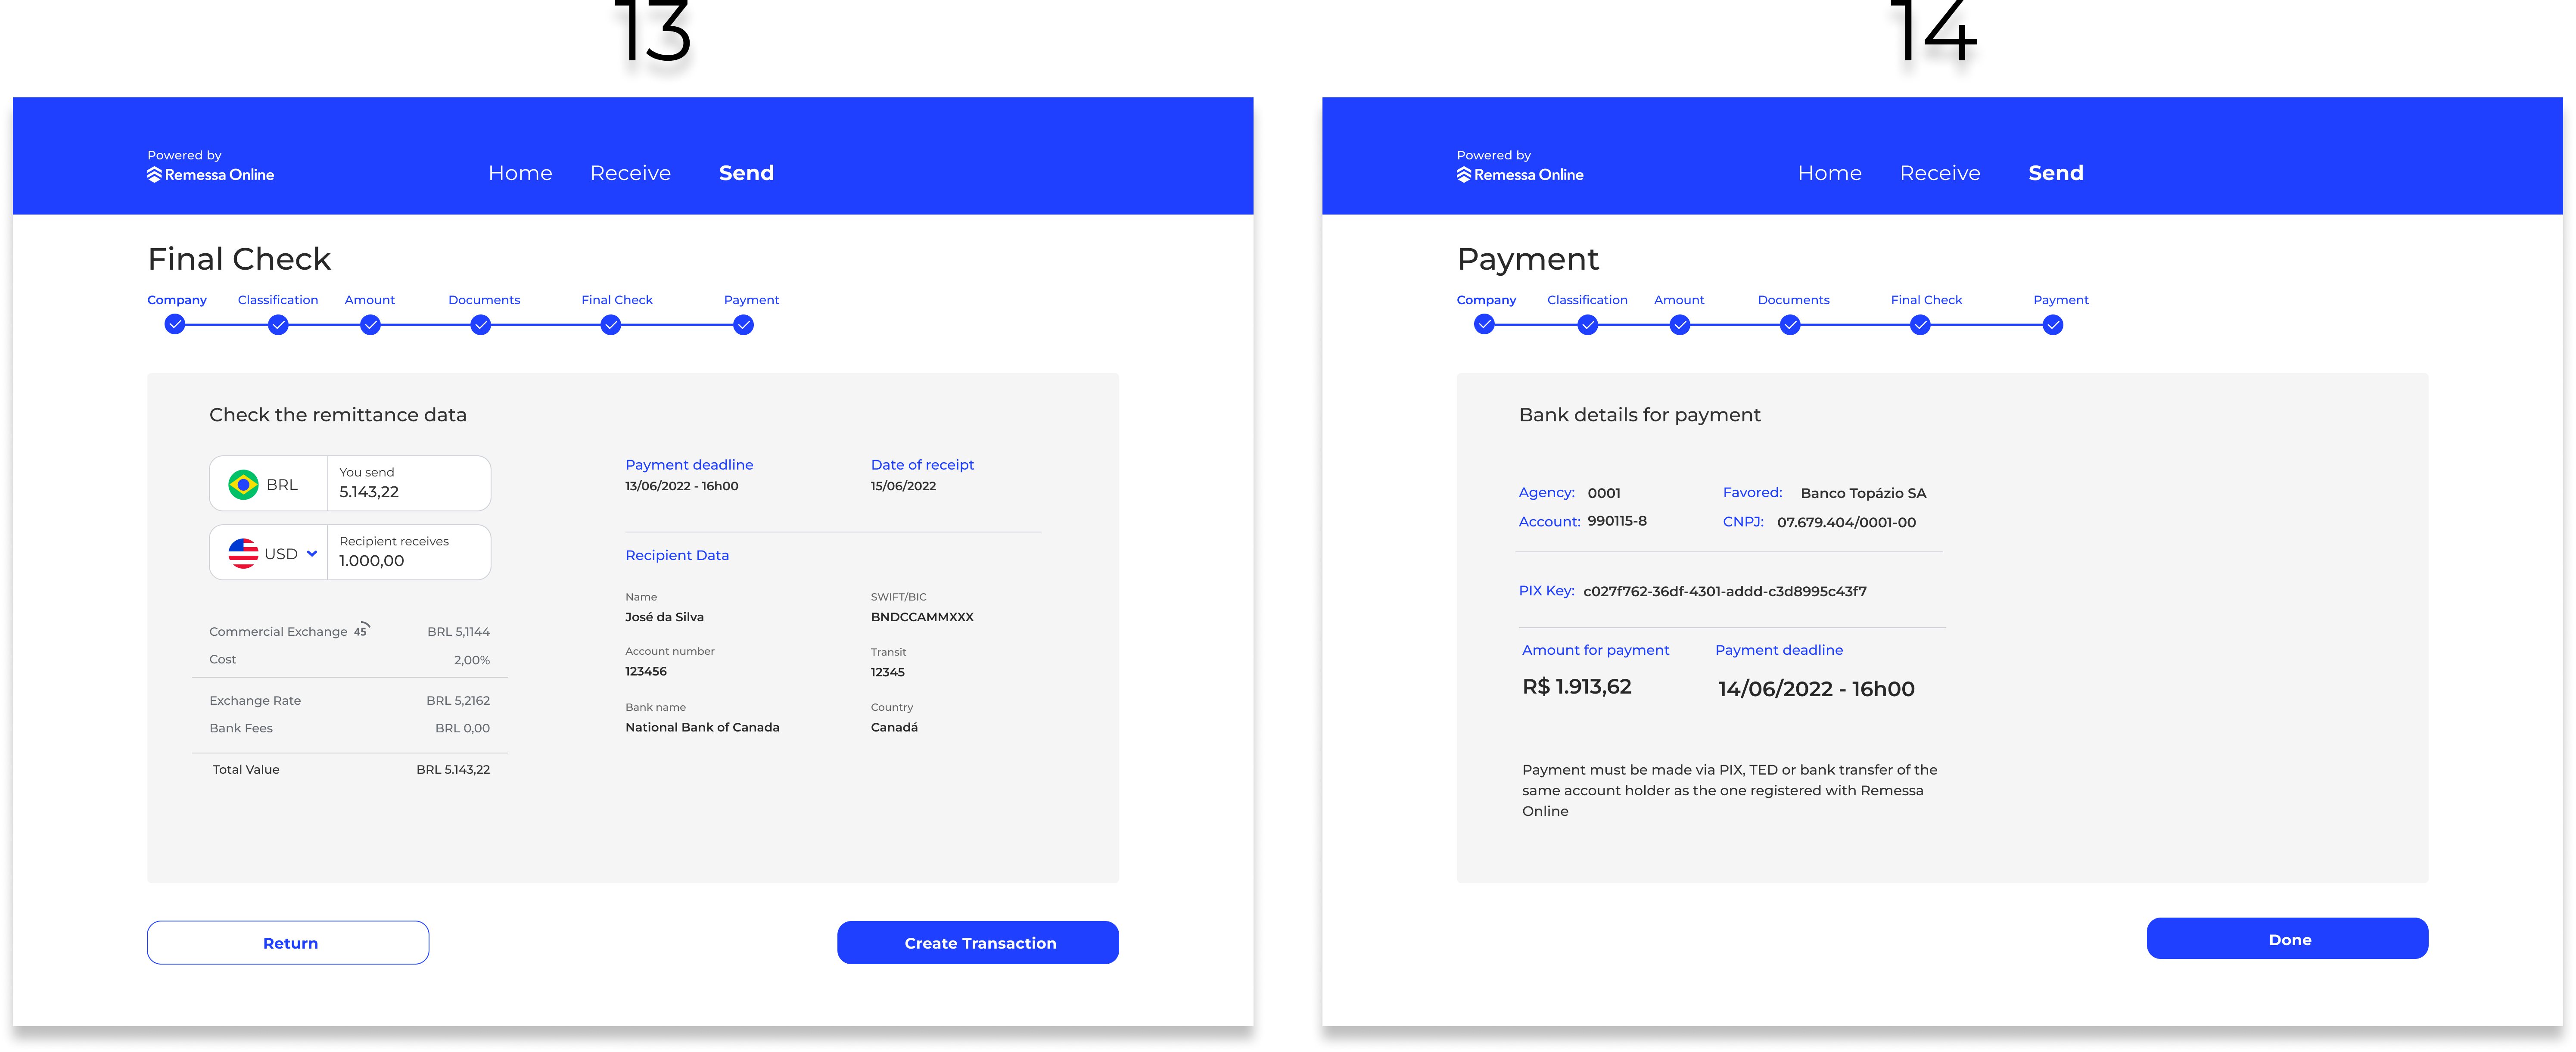
Final Check and Payment Screens
Updated 8 months ago
